Creating solutions
A guide to creating print-ready PDF files
What is a Print-Ready File?
Print-ready pdf files are the most expedient way to allow us to print your project.
Fast Proof Press utilises a pdf workflow which requires the pdf you send us to be set up in a specific way. The following pages will give you tips and show you how to export an InDesign file to a print-ready pdf.
If you have any questions, or need further assistance with producing print-ready pdf’s from another program, please email our knowledgeable staff in prepress via hub@fpp.com.au.
Creating Print-Ready Files Adobe InDesign CC
1. File > Export.
Set format to Adobe PDF (Print). Click Save
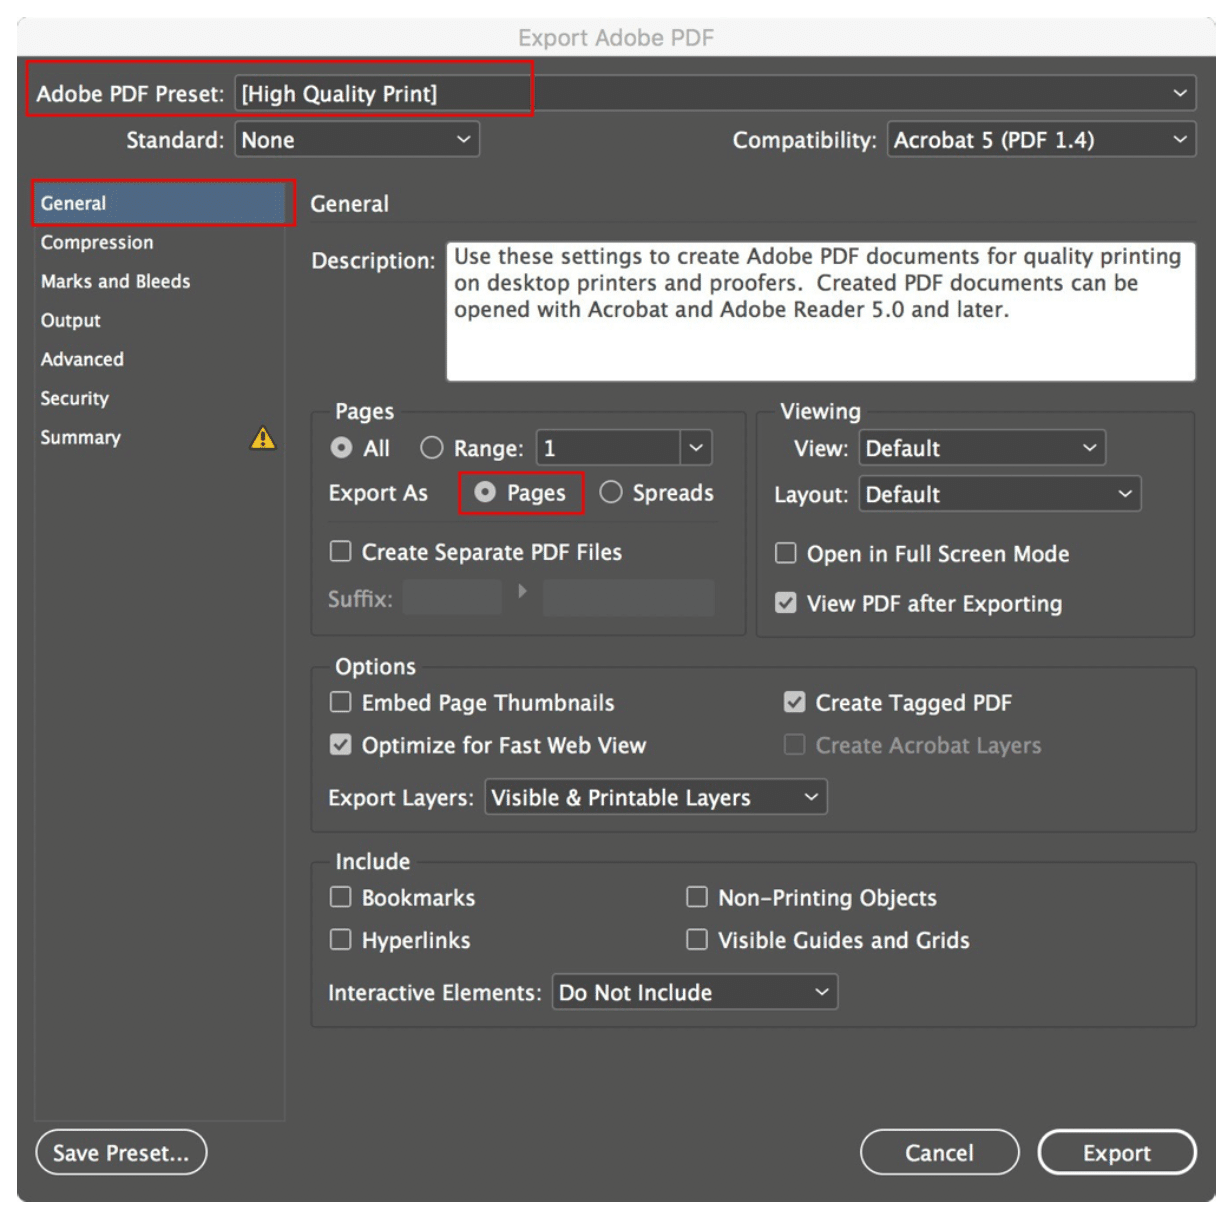
2. Start with the High Quality Print Adobe PDF preset.
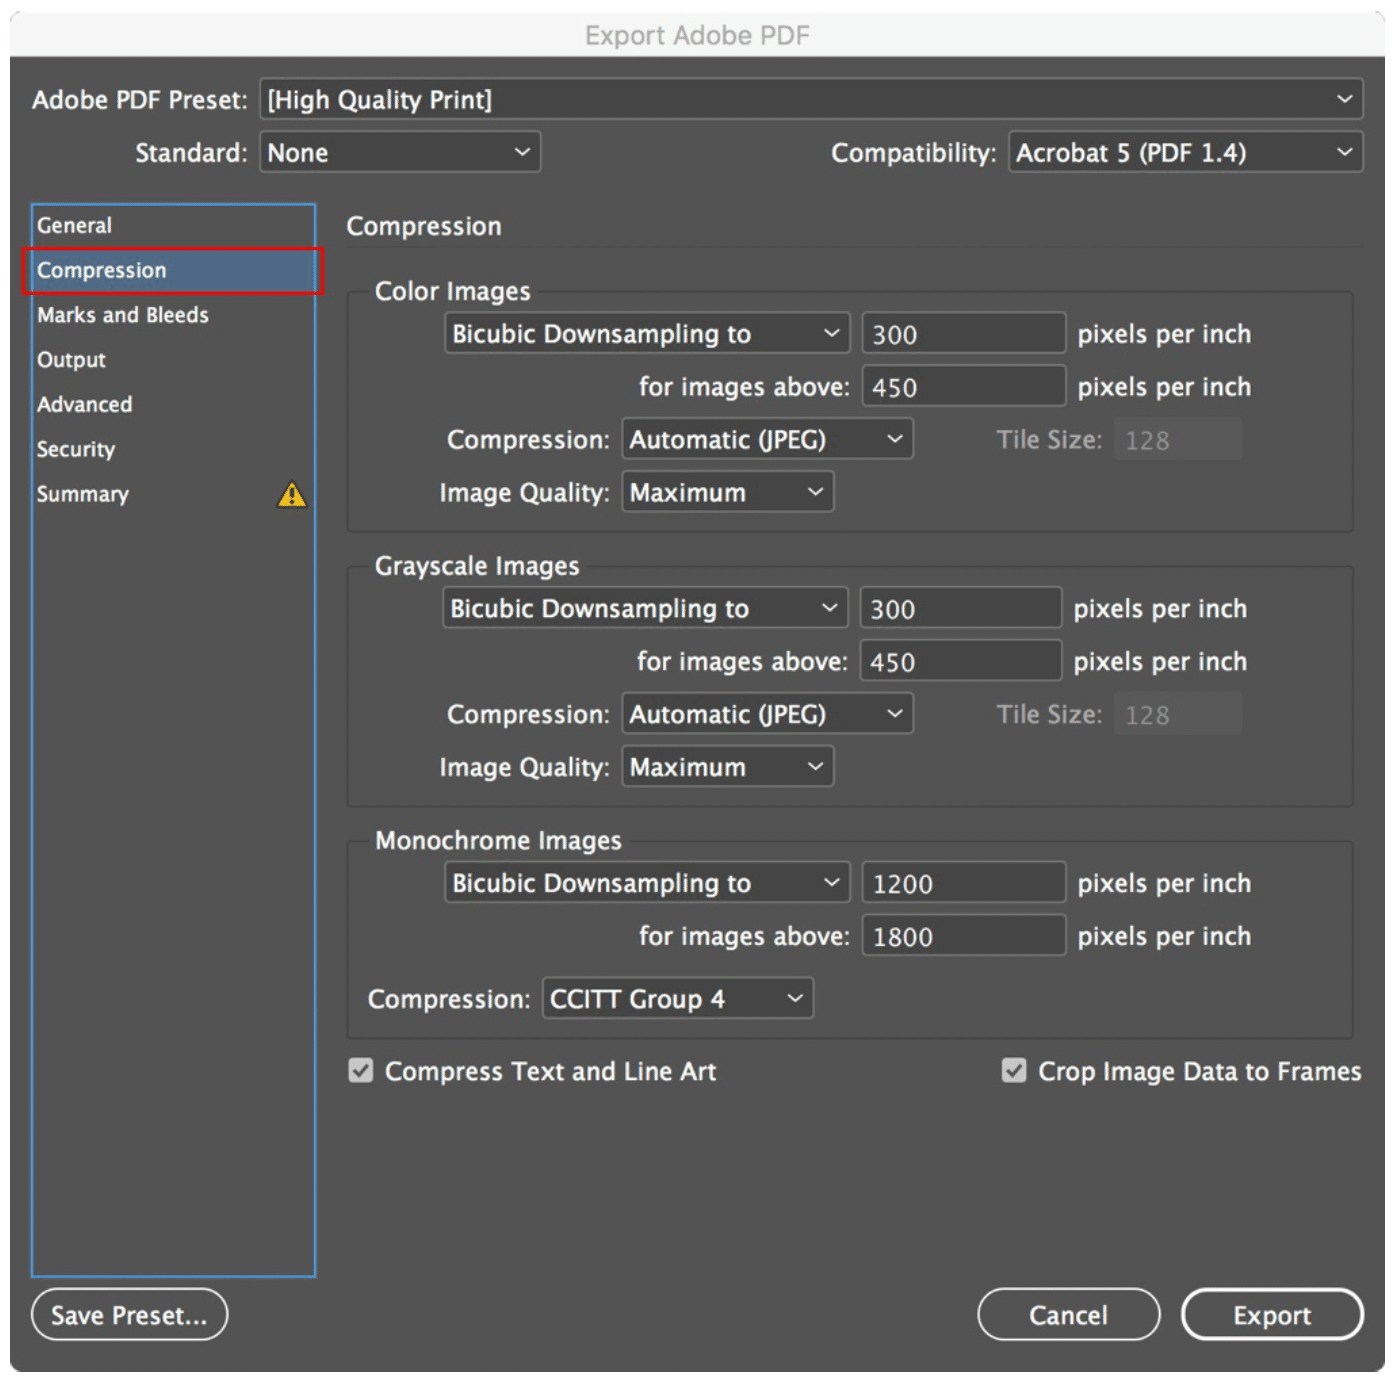
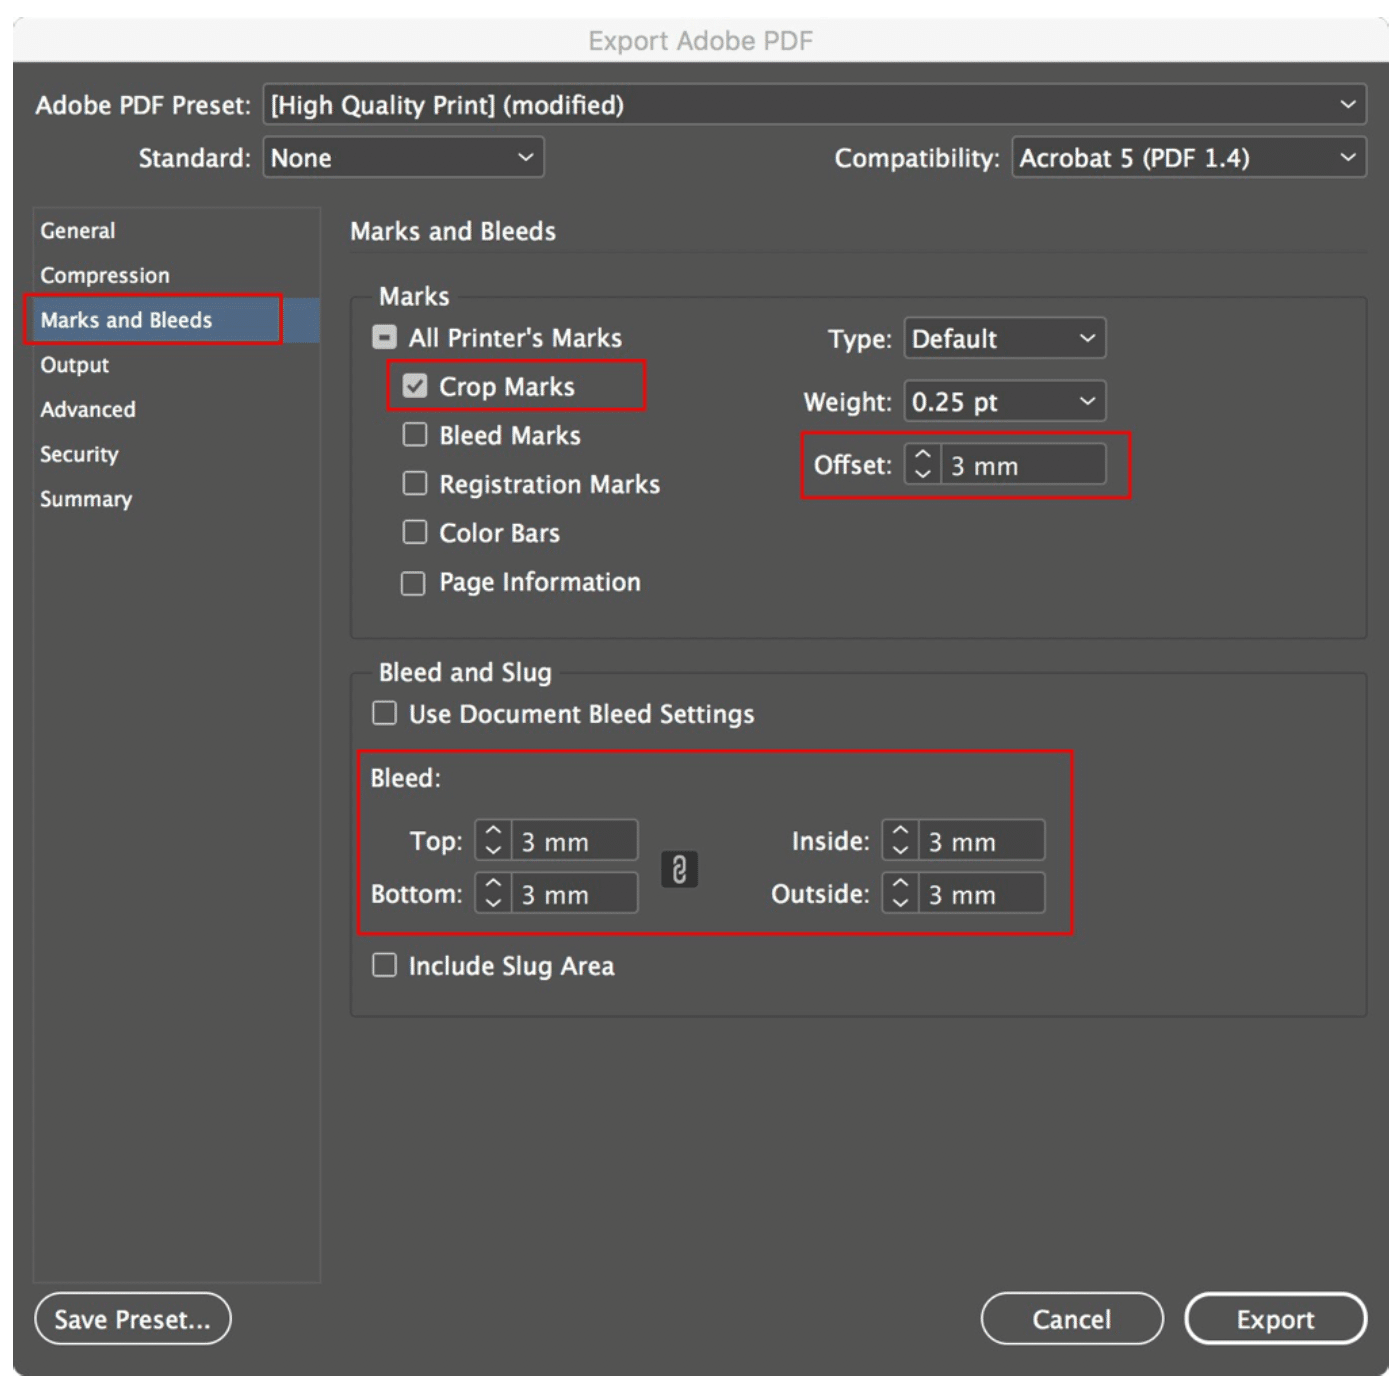
Make sure your settings match the screen shots that follow for the General, Compression and Marks and Bleeds tab options. The last four tabs can be left with the default settings.
General Options

Compression Options

Trim and Bleed Options
Any artwork that you want to print all the way to the edge of your finished print needs to extend past the edge of your page and into the bleed area. The bleed setting of 3mm allows this artwork to be printed on your pdf into the bleed area beyond the trims. The 3mm offset setting starts your trims at the edge of the bleed area.

3. Click Export and save your pdf.
Extra tips for creating a Print Ready PDF
Please ensure the below guidelines are followed to avoid having to resupply your artwork:
- Check your file size is correct for final trim.
- Only use trim marks with an offset of 3mm.
- Do not supply as ‘spreads’ or ‘printers pairs’. All pages to be supplied as single pages in one multi-page PDF file.
- Ensure white text isn’t set to overprint and all black text is black only, not CMYK or registration colour (always check your separations preview to make sure).
- Check all bleeds are set to 3mm around entire job.
- Ensure critical text and logo’s do not run across fold lines.
- Any large black panels should be 30% Cyan, 30% Magenta, 30% Yellow and 100% Black to give a rich black when printed.
- Make sure the document has been spell checked.
- All fonts must be embedded or converted to outlines/curves/paths. Always choose to download all fonts. Do not subset or choose not to include any fonts when creating your pdf file.
- Ensure specified spot colours are converted to CMYK. Never use RGB colours.
- Convert all RGB images to CMYK.
- Images should be 300dpi, Bitmap 600dpi (minimum). Logo’s are best as vector files within your PDF.
- Ensure allowance is made for folds (e.g. 1mm shorter on the internal page of a gate fold brochure).
- All cutting or folding guidelines should be outside the bleed area.


Comments are closed.